How I Shoot Dances
Posted on February 9th, 2009.
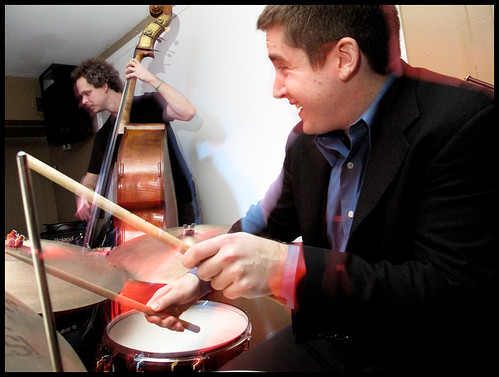
Last weekend Gordon Webster came to Rochester, NY to play a dance at The Keg. It was awesome (of course) and everyone had a great time.
I took a lot of photos during the course of the night (around 360 actually) and some of them turned out pretty nice. A few people have wondered how I got the look I did, so I decided to write a post about it.
I'm assuming you know what basic terms like aperture and shutter speed mean. If not, look for a post over at LindyBloggers fairly soon about shooting dances with a point-and-shoot camera.
- Shooting Dancers is Tough
- What Doesn't Work (for Me (Usually))
- Rethinking My Approach
- Using Everything
- Good Luck!
Shooting Dancers is Tough
One of the reasons I got into photography seriously was so that I could shoot dancers and musicians. I've since branched out and become interested in a lot of other aspects of photography, but dancing is a huge part of my life and photographing dancers is still something I absolutely love.
I (like many others) thought that getting a DSLR would let me take awesome dancing photos with a bit of practice. Well, it's not that simple. Dances are one of the hardest things I shoot for a couple of reasons.
We Move
Dancing, especially in a dance like Lindy Hop, involves a lot of movement. It makes focusing a huge pain unless you've got really good eyes. I don't. When I first started out the majority (at least 70%) of my dance photos were out of focus. It's much more difficult than shooting a still (or even slowly moving) target.
Moving quickly also means you need a fast shutter speed if you want anything to be sharp. You can focus perfectly but that won't freeze any movement. This wouldn't be an issue if it wasn't for the second main problem.
The Lighting at Dances is Awful
Seriously, it's terrible. It's always fairly dark to set the mood; you don't want to dance in a brightly lit place unless you're competing. To make matters worse, it's almost always ridiculously uneven. Part of the room with usually be two or three stops darker than the rest.
Only shooting in one place helps, but is fairy boring. A lot of people will stay in the same general area for most of the night (damn cliques!) and so if you only shoot one section of the floor you'll miss a lot of people.
What Doesn't Work (for Me (Usually))
I've tried a couple of different techniques to overcome these problems. Some of them work in some situations but most of the time they leave me unhappy.
Fast Primes, High ISO
The first remedy I turned to was buying a fast prime lens (Pentax 50mm f/1.4) so that it would let in more light. With that lens I would turn up the ISO to 1600 or so to get even more sensitivity and hope for the best. This kind of works, but has some issues.
The Good
Shooting with a fast prime means I only have to carry one lens around and don't need to change it during the night. They're usually pretty light too, so they're easier to work with. 50mm is a nice focal length that lets you stand far enough away to not get kicked. You also don't need to annoy people with flash.
The wide apertures let more light in so you can actually get some decently exposed photos at workable shutter speeds. The ISO isn't much of an problem as long as you expose the photo right (if you have to bring up the exposure more than a half stop in post it looks terrible).
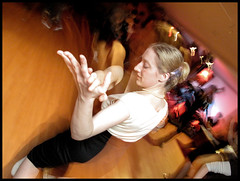
This solution really excels if you're shooting classes or workshops. The light there is usually much better than at actual dances but still not ideal. The wide apertures let you soak up all of that light and you can get some really nice photos. The example in this section was taken at Girl Jam last year during one of the classes with my 50mm.
The Bad
Focusing on moving dancers is hard enough at "normal" apertures; trying to nail the focus when you've only got six inches of depth of field at f/1.4 is nearly fucking impossible. Maybe other photographers are better at manually focusing or have amazing Canon/Nikon cameras that can focus on a black cat in a darkroom, but I'm not and I don't.
The focal length of most fast primes is generally around 50mm. This isn't too bad, but I've grown to really love wide angle lenses. 50mm feels too far and detached for my taste. Yours may be different, so give it a try.
Bounced Flash, Max Sync Speed
For a while I was adamant that I would never use flash. I figured it would be annoying and that the "unnatural" light from the flash would somehow look wrong. I avoided it for a while in favor of fast primes and "natural" light.
Eventually I noticed that some other photographers shot with flash at dances and it didn't annoy me (while dancing) at all. I decided to give it a shot and see how it worked, especially since I was getting really into Strobist and studio lighting at the time.
The basic idea is that you use an external flash (preferably off camera, synched with a cord or radio triggers) and bounce the light from the ceiling to get more even coverage. You set the aperture to something moderate like f/4 or f/5.6 and the ISO fairly low. You turn the shutter speed down as low as it will go and still sync up and let the strobe do the hard work.
The Good
You get sharp photos! What's more, focusing is no longer something you will curse vehemently! When you're shooting at f/4 or f/5.6 you have a good amount of depth of field so the focus doesn't have to be absolutely perfect.
The flash only lasts about 1/1000 of a second. No one moves much in that time, so you get perfectly sharp photos despite the movement.
Now that you're not relying on wide apertures you can start using different focal lengths instead of sticking with the fast prime or two that you have. You could even use a zoom lens if you don't want to change lenses all the time.
The Bad
Bouncing from the ceiling is far, far better than keeping your flash on camera and pointing it straight at the subjects, but unless the room has obnoxiously high ceilings you're still going to get a lot of falloff towards the back of the room. You might not mind; it does help isolate the subjects from their surroundings but I found myself getting tired of it pretty quickly.
You also have to carry a flash, sync cord or triggers, and extra batteries around which is kind of a pain. I don't mind, but if you like traveling light it could bother you.
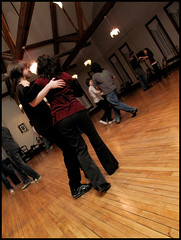
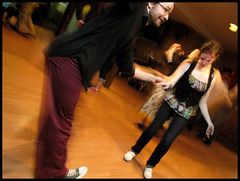
This section's example is one of the better results of this technique: Tango Cafe's ceilings are very high so the light is pretty even everywhere. High ceilings come at a price, however: you need more power from the flash to illuminate everything and so can't shoot as fast.
Rethinking My Approach
After using these two methods for a while I stopped and looked at my photos. I wasn't as happy with them as I would have liked. I sat down and asked myself: "Why is that?" The photos were exposed well and aside from the focusing mishaps were pretty sharp. What was missing?
Eventually I came up with my answer: "Movement." Lindy Hop is very much about movement; it's one of the most important parts of the dance, maybe even the most important part. Getting tack sharp photos is great, but it's very hard to convey movement with them unless you're a much better photographer than I am.
Most people are not photographers. Most dancers are also not photographers. The majority of Lindy Hoppers will take photos with small point-and-shoot cameras, if they can drag themselves away from dancing for a little while!
The result is that we don't usually see many dance photos (because we're too busy dancing to take them) and the ones that we do see are usually blurry (because point and shoot cameras in their default modes are just not equipped to take sharp ones).
Even with their flaws, we love them because they're the few photographic memories we have of some of the best nights of our lives.
I wanted people to have the same feeling toward my photography as they do toward these informal snapshots. I wanted to capture the essence of these pictures we're so grateful for but use my experience to make something even better.
I think I've finally figured out how.
Using Everything
What evokes the feeling of movement in the point-and-shoot shots we look at? I think it's the blurriness. Our culture is used to looking at photographs and we know that "blurry photograph" usually means "moving subject" even if we're not always 100% clear on the physics of it.
As photographers, we know what causes it. A subject moving while the shutter is open produces blur. Longer shutter speeds mean more blur. The little cameras that most of our memories come from simply don't have the aperture or sensitivity of our hefty DSLRs – all the poor little things can do is leave their shutters open a bit longer to get the light they need. That's why those cameras make blurry photos with their default settings.
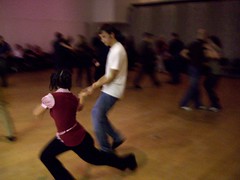
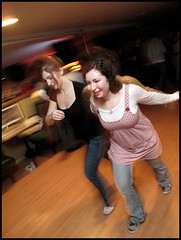
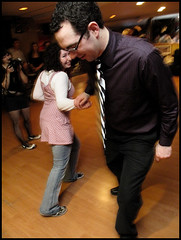
So how can I add some blurriness to my images? Use a slower shutter speed! I also want to keep some sharpness though, so the dancers are more recognizable. To do this, I use flash at the same time. The flash freezes the subjects enough to make them look good and then slow shutter speed and ambient light take over to add some movement.
The Technique
What do you need to do this kind of thing? You can get by with any modern camera with a built-in flash, but to really have the flexibility that will make you happy you need the following things:
- A camera with a hot shoe or PC jack and manual controls. I use a Pentax K20D when I feel like lugging it out and a Canon G10 when I don't.
- An external flash. I use an $80 Vivitar 285hv which will work with anything, so no complaining about how your camera maker only sells $400 speedlights.
- A way to sync your flash with the camera. Some of the more expensive flashes have a wireless mode. If not, you can buy radio triggers for $60 or so, or buy a sync cable for $15 to $20. Trust me, having the flash off of the camera makes things so much easier.
Step 1 – Dial in the Flash
The first step to getting this look is to figure out what kind of exposure you need with the flash alone to get a well-lit shot.
Turn your shutter speed down to the fastest it will sync (1/180th is usually fine) and use trial and error to find a nice combination of aperture, ISO and flash power. The actual numbers will depend on several things: how low the ceilings are, how powerful your flash is, etc.
Aim for the lowest flash power you can while still keeping a good exposure, a narrow enough aperture to make focusing easy, and modest ISO noise. Once you figure it out you can probably keep those settings for the rest of the night, unless the ceilings are higher on one side of the room or something else equally annoying.
Step 2 – Dial in the Ambient
This is the step that adds the movement. First, tone down your flash-only exposure by a half or whole stop. Do this by reducing the ISO, aperture, or flash power; any of those is fine.
Now that your photo is underexposed, turn off the flash. It will probably be completely black now. Do not touch the ISO or aperture to fix this. Lengthen the shutter speed until you're about two stops underexposed; it will be blurry and dark as hell but this is what you want right now.
Step 3 – Combine and Adjust
Turn the flash back on. Do not touch any other settings – flip the switch on the flash and start shooting. This will let the flash illuminate the subjects (because you dialed in the power, ISO and aperture before and haven't changed them) and the ambient fill in and add movement (because you adjusted the shutter speed).
Your first few shots will probably be underexposed or overexposed and have too much or too little blur. Don't worry, it always takes me at least a half hour to start taking decent photos this way. You really need to play with the settings as you go to find out what's going to work for the lighting that night.
Things to Watch Out For
There are a couple of tricky parts to this style of shooting that I'll mention. First I'll talk about the typical problems you'll see right away. More than one of these certainly might apply; fix them one at a time.
- If the background is dark or there is not enough blur, you need to use a longer shutter speed to let more ambient light in.
- If the dancers are not sharp enough, you need more flash power. Turn it up a little bit at a time.
- If people's shirts, faces and limbs are overexposed and not blurry, you need to turn down the flash. Bring it down a bit by reducing the power, narrowing the aperture or reducing the ISO.
- If shirts, faces and limbs are overexposed and blurry, you need to shorten the shutter speed to let less ambient light in.
I'm warning you now, fixing one of these will probably fuck something else up. It can be really infuriating, but if you slow down, stay calm and think through it logically you'll be able to narrow it down and figure out what you need. It's a really good feeling when you finally nail it.
There are two other tricky problems that I'm still working on myself:
- Dances are unevenly lit. When you walk over to the other side of the room to shoot, you'll have to adjust the shutter speed to compensate for the different amount of ambient light. You really only have a range of about half a stop where the ambient gives you the right amount of blur, so you have to be careful and stay on your toes.
- Watch where you bounce. In rooms with low ceilings, where you point the flash on the ceiling has a huge effect on the lighting. You need to be conscious of what part of the ceiling you're bouncing from to get good results.
Good Luck!
I hope this post helped you out. Even if you hate how my photos look and don't want to make anything like them, at least it will show you what not to do. I'd love to hear comments or advice on what you like or don't like, and what I could do better. If you've got questions I'll do my best to answer them too!
Now go dance, have fun, and make beautiful photographs so we can all remember the fantastic events we make happen!

